How to create barcodes in Adobe Illustrator 2021 — Tutorial
Many people use Illustrator for designing book covers, blisters or packaging. In most cases barcodes have to be added to the artwork. There are two ways to create barcodes in Illustrator: You can use an integrated solution, like a barcode extension or plug-in or you can use an external barcode generator to create the code and then import it into Illustrator. In this tutorial we look at the different options for adding a barcode to your artwork.
Adobe Illustrator — Create Barcode with a Plug-in
The easiest way to create a barcode in Illustrator is via a barcode extension or plug-in. A fully integrated solution saves time and reduces errors. In this and the following sections, we’ll show you how to create a barcode and add it to your artwork. The screenshots show the Softmatic Barcode Extension for Adobe Illustrator 2021; if you want to follow along, you can download it from the Adobe Exchange or from the Creative Cloud app (tab Stock & Marketplace > Plugins and search for «softmatic»).
Barcode creation works in four simple steps:
1. Select barcode type, e.g. Code EAN 13
2. Enter your data, e.g. «401234567890»
3. Set properties of the code like EAN SC size, bar width reduction or toggle the display of human readable text
4. Add the barcode to your artwork; the code will be inserted into the top layer
Let’s look into the individual steps in more detail:
Step 1: Select barcode type
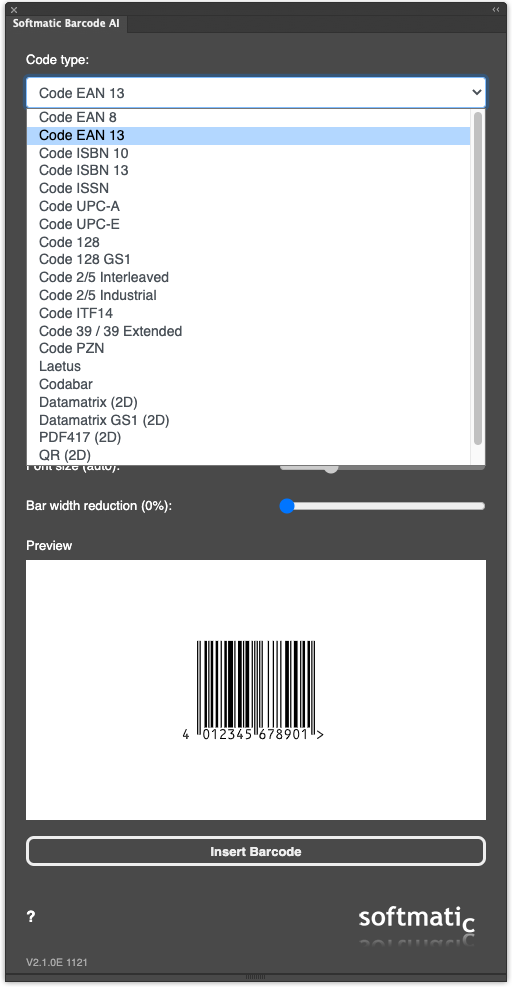
We begin by selecting the required barcode symbology. In this example we will be creating a Code EAN 13 barcode. EAN 13 is used for retail and is one of the most used barcode symbologies. It is easily recognizable by the characteristic bar pattern and the single digit on the left side of the symbol.
Click the Code type drop-down and select «EAN 13»:
Step 2: Enter your data
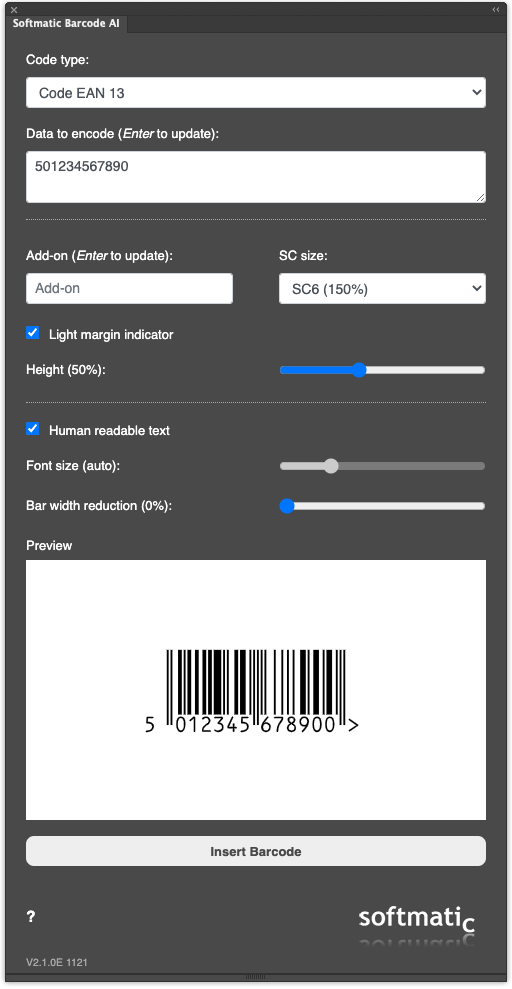
EAN 13 encodes 12 digits plus a mandatory check digit, hence the name. Enter our data («501234567890») and hit <Enter> to update the preview:
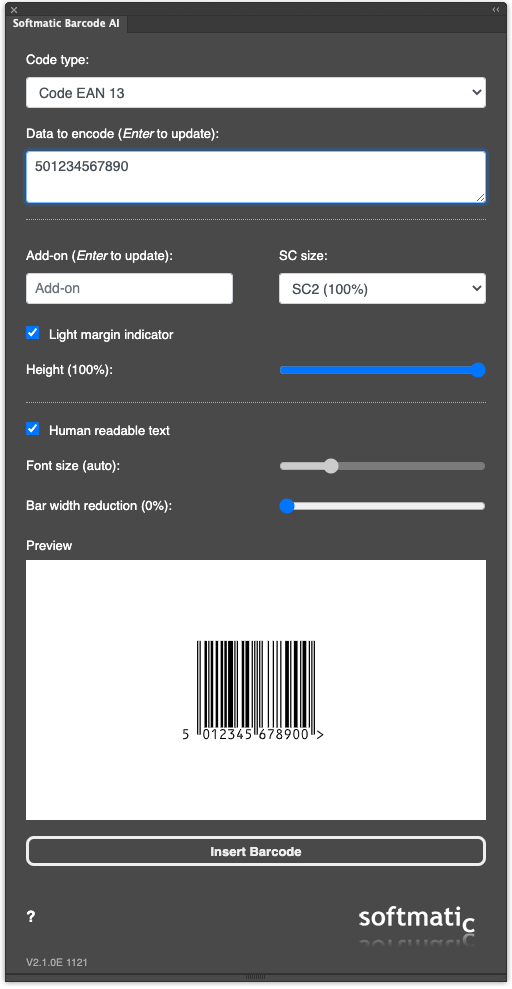
Note how the extension automatically calculated and appended the check digit («0») to the data so that the text line under the code now reads «5012345678900». As a rule, the extension will always recalculate the check digit to make sure a valid barcode can be created.
EAN 13 will only encode numeric data. Note what happens when you try to encode letters («abcdef»):
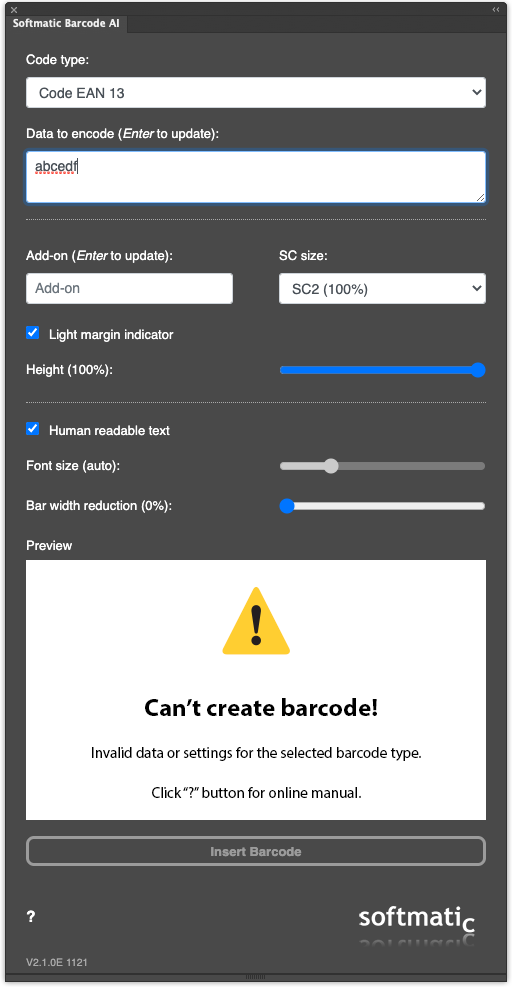
The manual lists the data requirements for all supported barcodes.
Step 3: Set barcode size and style
EAN 13 is standardized; the extension will by default create an EAN 13 in size SC 0, resulting in a barcode that is c. 26mm high and 37mm wide (more about EAN / UPC SC sizes and dimensions). We want a larger code (SC 6) but with half height (50%). Note how the preview is updated in realtime as you set styles and size:
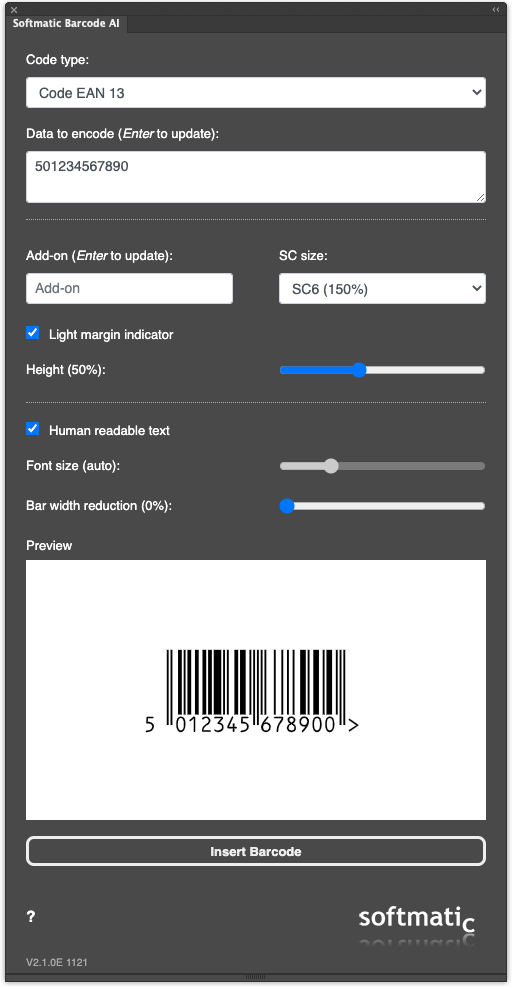
As an aside, with EAN and UPC the size of the human readable text line is calculated automatically by the extension to fit the text properly under the code. Hence, the option to set the font size is grayed out.
Step 4: Adding the barcode to your artwork
Once we are happy with the barcode, we can add it to our artwork. Click «Insert» to add the code to the top most layer of the document (make sure the layer is visible and not locked):
Tip: The inserted barcode is an ordinary graphic element. As such it can be freely moved around, rotated or scaled to fit your designs. We recommend setting up a dedicated layer for your barcodes and then lock the layer to prevent accidental changes to the code. See best practices further down.
All the above steps are also in this video that gives an introduction to the Softmatic Barcode Extension for Adobe Illustrator:
Adobe Illustrator — The Softmatic Barcode Extension
In addition to the standard retail barcodes, the Softmatic Barcode Extension also supports a wide range of linear and 2D matrix codes and will also let you create QR codes directly in Illustrator — ideal if you want to add codes with URLs or email addresses to your document.
In total the plug-in supports over twenty different symbologies:
- EAN 8
- EAN 13 (with optional add-on)
- ISBN 10 (with optional add-on)
- ISBN 13 (with optional add-on)
- ISSN (with optional add-on)
- UPC-A (with optional add-on)
- UPC-E
- Code 128 A, B, C
- Code 128 GS1
- Code 2/5 Interleaved
- Code 2/5 Industrial
- Code ITF-14
- Code 39 / 39 Extended
- PZN 7 / PZN 8
- Laetus
- Codabar
- Datamatrix (2D)
- Datamatrix GS1 (2D)
- PDF 417 (2D)
- QR (2D)
- Aztec (2D)
Barcodes can be widely customized with options for size, readable text and bar width reduction to compensate for dot gain during printing. The extension performs all required data formatting and check digit calculation in the background — no macros or programming required.
The barcode extension works stand alone, no online access, external components or barcode fonts required. Illustrator documents with barcodes are free of dependencies and can be shared without restrictions.
Softmatic Barcode Extension — Sample Barcodes
We’ve provided two extensive documents that show all supported codes:
Sample with all code types: File format: PDF
Softmatic Barcode Extension — Download
The Softmatic barcode extensions for InDesign, Illustrator and Photoshop are available on the Adobe Exchange and from the Softmatic online store.
Adobe Illustrator — Using a barcode generator
A stand-alone barcode generator is preferable if you use an older Creative Suite version of AI (CS3, CS4, CS5, CS6 etc.) that doesn’t support the plug-in.
Our recommendation here is Softmatic BarcodePlus V5, download here (macOS 10.15 or higher, pre 10.15: here, Windows 10 here). The app creates all common retail barcodes, like EAN, UPC or ISBN and will save codes as EPS/PDF and in various raster formats. In addition BarcodePlus V5 supports a wide variety barcodes for warehousing, pharmaceuticals and 2D symbologies like QR, Aztec or PDF417.
Barcodes in Adobe Illustrator — Best Practices
- Before creating the barcode, talk to your print shop about the requirements with regard to bar width reduction.
- Offset printing: 1-2%
- Laser printing: 1-2%
- Thermo-, thermotransfer printing: 0%
- Inkjet printing: Plain paper — 5%, Inkjet paper — 1-2%
- Pad printing: up to 10%
Verifying and scanning barcodes
We recommend test scanning or verifying barcodes before going into production. Current smartphones will be able to detect and scan barcodes with the built-in camera.
Screenshot shows the CoScan app, a PDF and barcode scanner for iPhone. The barcode is detected and decoded in the life image; the encoded data can then be copied to the clipboard for further use in Excel, Word, Notes etc.:
This app can also be used to identify an unknown barcode type; the respective symbology («EAN 8» in this case) is written next to the data.
Barcodes in Illustrator
Using a plugin for creating barcodes in Adobe Illustrator might sound like a good idea. Here at Appsforlife we made several plugins for Adobe products, but for barcode generation we decided to use a different approach. Here’s why:
Pros of Using Barcode Plugin for Illustrator
Plugins are convenient. You get new features as a part of the software you know with the user interface you know: creating a barcode in Adobe Illustrator is like creating yet another shape.
You get the maximum quality of the artwork, as the plugin talks directly to Illustrator and makes vector barcodes that can be easily resized and rendered with the DPI you need.
Cons of Using Barcode Plugin for Illustrator
There are three main reasons to avoid having a barcode generator as a plugin:
- Adobe vendor lock — by investing into Illustrator plugin you lock yourself with Illustrator. If for instance you decide to use Affinity Designer or any other competitive software, you will need another plugin for that software;
- Plugin vendor lock — most plugins add their own data to the projects, so everyone needs the plugin to see the barcode you added to the Illustrator document. This might be OK if you work alone, but for more complex projects this could easily become a problem;
- Software updates — Adobe releases major updates to Illustrator once a year. Old plugins may not work properly with the new version of Illustrator and you will have to wait until the plugin vendor updates it, or keep old Illustrator around to use the plugin.
So with a plugin you lock yourself to a specific version of a specific software. Although this might not be a problem, sometimes it can bite you.
Solution?
A good alternative to barcode Illustrator plugins would be a standalone application with Illustrator integration. This way you don’t depend on a particular version of Illustrator, or Illustrator at all. You make barcodes in a separate application, then use them in the graphics editor of your choice.
That’s what we did in our barcode software. It is a separate standalone application where you edit barcodes the way you need, then you simply drag a barcode into Illustrator or any other software and use it there.
Here’s how our Barcode software answers to the issues mentioned above:
- Adobe vendor lock — with the standalone barcode generator you are not limited by Illustrator, you can use literally any artwork editor;
- Plugin vendor lock — standalone barcode generator uses open standards and adds nothing specific to Illustrator projects, so anyone can open them;
- Software updates — with the standalone barcode generator you are not limited by a particular version of Illustrator, so if Adobe releases an update, your barcode generator is already compatible with it.
As for the barcodes quality, our barcode generator sends barcodes to Illustrator in EPS format, so you get the same vector quality, as with the plugin.
Standalone barcode generator application is an one-off investment that sorts out your barcode needs regardless of the software you will be using in the future.
On Top of That
Being a standalone application adds some other perks. For instance you can do batch generation of barcodes using a list of codes as input. Again, the output is vector, so you get the best possible quality.
Another feature is command line barcode generation. Basically, if you need to automate your barcodes, you can use any automation software to pass the codes as command line parameters to the barcode generator and get the output for further processing. This is impossible with a plugin that is designed to fit the user interface of your vector graphics editor.
Our standalone barcode generator supports the wide range of industry standard barcodes with advanced features like resizing, fine–tuning of details, spot colors and more.
Ready to Try?
We provide a free demo version of the software that lets you try the product and decide if it fits your requirements. Click the Download button at the top right corner of this page to get the demo.
Adobe and Adobe Illustrator are either registered trademarks or trademarks of Adobe Systems Incorporated in the United States and/or other countries.
Как сделать штрих-код в Adobe Illustrator
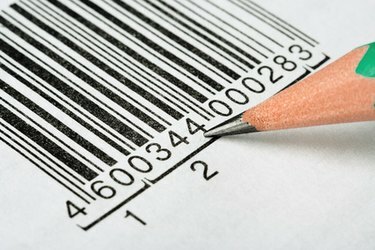
Штрих-коды легко создавать в Adobe Illustrator с помощью сторонних плагинов.
Штрих-коды встречаются практически на всех мыслимых продуктах и используются не только на упаковке для супермаркетов. полка, но также и для всего, от управления запасами на складах до маршрутных накладных на ночь отгрузки. Создать штрих-код в Adobe Illustrator легко, используя один из множества плагинов, разработанных специально для этой задачи. Вы также можете использовать несколько сторонних продуктов для создания штрих-кодов и вставить результат в Illustrator (см. Ресурсы).
Создание штрих-кода в Adobe Illustrator
Шаг 1
Загрузите соответствующий плагин для своей версии Adobe Illustrator, который включает кодировку для типа штрих-кода, который вам нужно создать. Существует более десятка различных конфигураций широко используемых штрих-кодов. Не все плагины Adobe Illustrator охватывают все доступные конфигурации. В этом примере создания штрих-кода используется продукт Barcode Toolbox.
Шаг 2
Убедитесь, что Adobe Illustrator в настоящее время не запущен в вашей системе. Установите загруженный плагин в папку Adobe Illustrator Plug-Ins или в любую другую папку, указанную в выбранном вами плагине.
Шаг 3
Запустите Adobe Illustrator, дважды щелкнув значок Ai. Некоторые плагины штрих-кода перечислены как новый фильтр; другие, такие как Панель инструментов штрих-кода, установлены на панели инструментов Illustrator (положение по умолчанию в левой части экрана). Откройте инструмент создания штрих-кода или фильтр штрих-кода, если вы используете другой плагин. Это приведет к появлению окна в рабочей области Illustrator, в котором вы будете вводить данные штрих-кода.
Шаг 4
Введите тип создаваемого штрих-кода или выберите его из раскрывающегося меню в окне «Создание штрих-кода». Для дизайна упаковки вы обычно используете штрих-код типа UPC или EAN. Приложения для складирования обычно используют тип штрих-кода Code 2-of-5 или Code 128.
Шаг 5
Введите код продукта, книги или другого элемента в окно кода. Этот номер будет выдан вашим бухгалтерским отделом или другим внутренним источником — он не создается автоматически подключаемым модулем Adobe Illustrator. Каждый тип кода имеет разные обозначения формата; следуйте примерам формата, которые поставляются с вашим плагином штрих-кода, или просмотрите список Barcode 1 в разделе «Ресурсы».
ШАГ 6
Выберите любые ограничения ширины, увеличения и высоты полосы для вашего продукта в соответствующих областях ввода инструмента создания штрих-кода.
Шаг 7
Щелкните в любом месте документа Adobe Illustrator за пределами инструмента создания штрих-кода, чтобы создать новый штрих-код. Выделите все элементы штрих-кода (Cmd-A на Mac; Cntrl-A на ПК) и перетащите его в нужное место на иллюстрации в Illustrator.
Вещи, которые вам понадобятся
Соответствующий плагин штрих-кода для Adobe Illustrator ИЛИ
Сторонний генератор штрих-кода, который может выводить графический файл
Кончик
Чтобы быстро создать штрих-код, не требующий установки подключаемого модуля, используйте онлайн-генератор штрих-кода, указанный в разделе «Ресурсы». Введите свои данные и выберите тип штрих-кода из раскрывающегося окна. Щелкните правой кнопкой мыши, чтобы сохранить изображение как .png, .gif, .jpeg или .bmp. Вставьте в иллюстрацию Illustrator с помощью Cmd-V (Mac) или Cntrl-V (ПК). Обратите внимание, что этот обходной путь не приведет к созданию векторного изображения; если вам нужна векторная графика, используйте плагин Adobe Illustrator.
Как сделать штрих-код в Illustrator
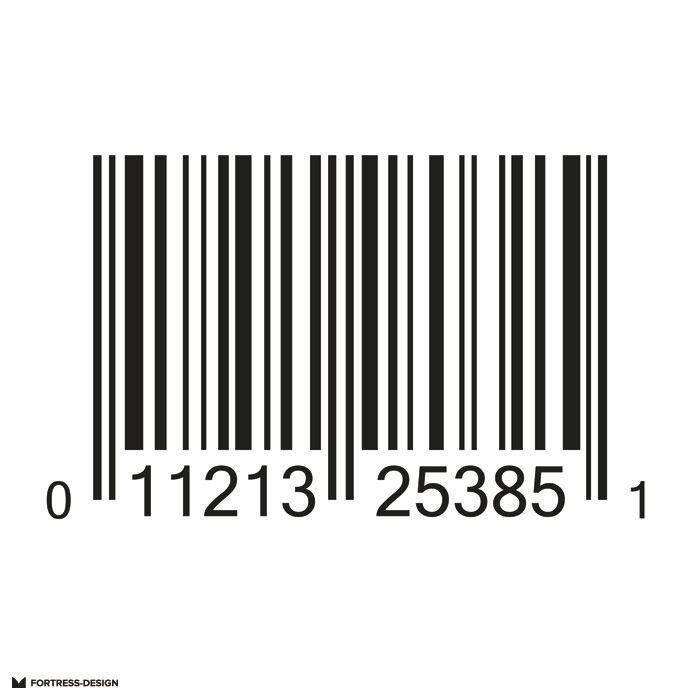
Здесь описывается инструкция по установке плагина EAN13Maker специально разработанного под Иллюстратор.
Идете на сайт https://www.adobeexchange.com
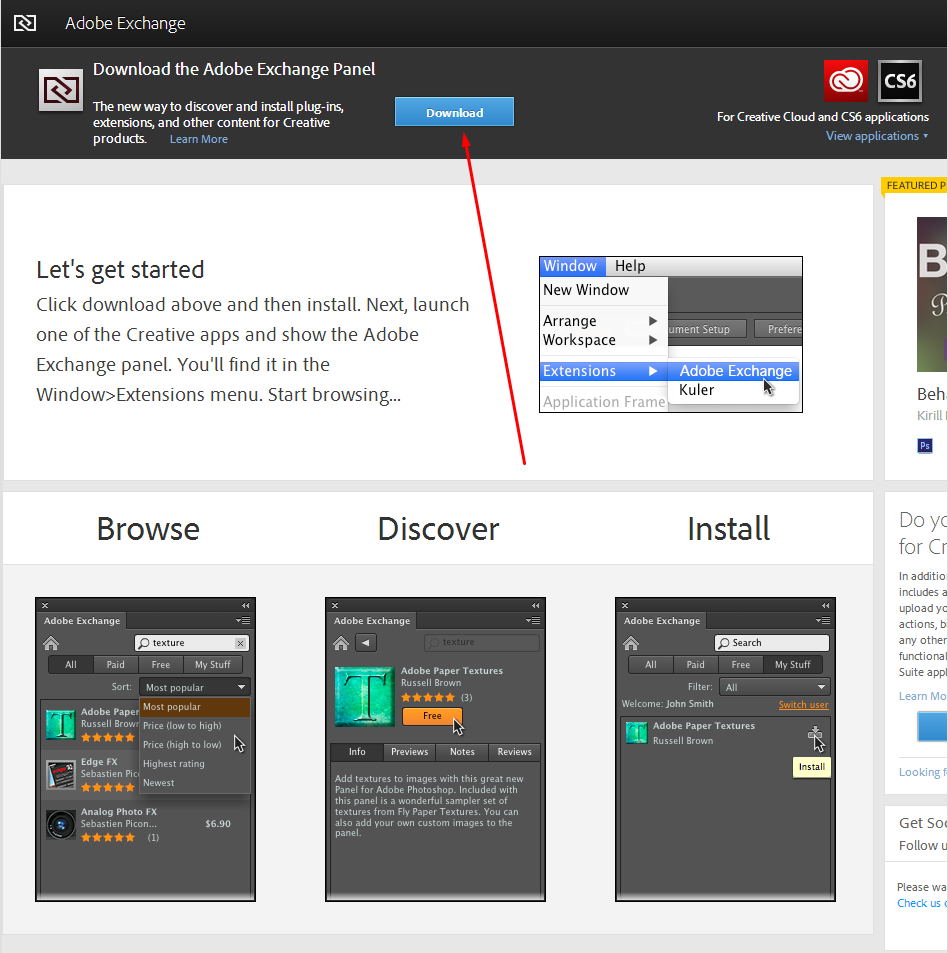
Кликаете сверху «Даунлоуд».
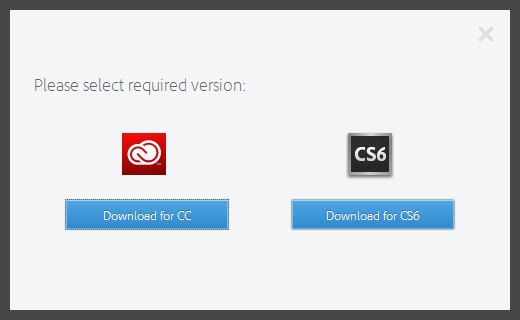
Выбирает версию Cloud или CS6 и скачиваете на компьютер.
Запускаете. Происходит загрузка и обновление расширений.
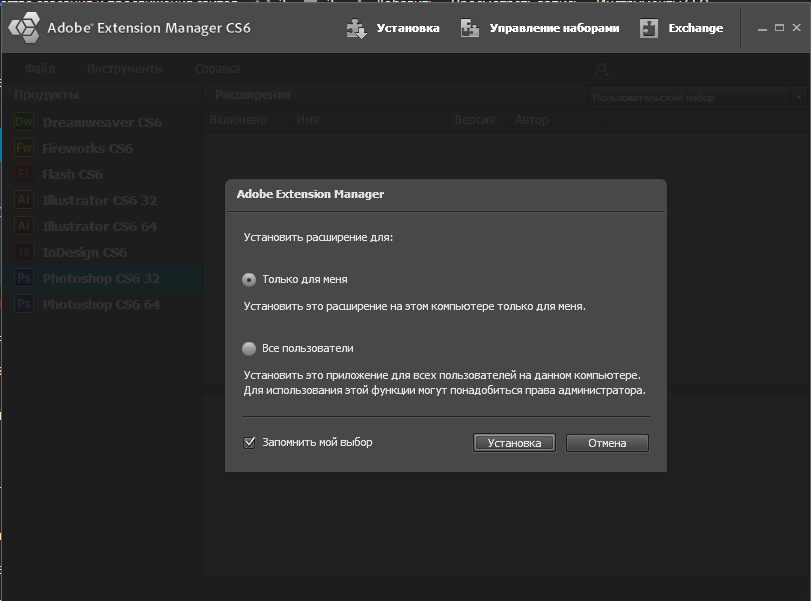
Принимаете условия лицензии, после чего начинается установка.
Появляется окно об успешном завершении процесса инсталляции.
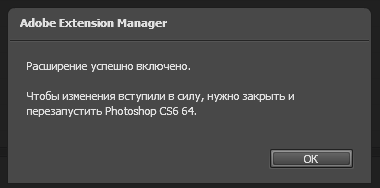
Теперь перезапускаем Иллюстратор.
Ставите себе Adobe Exchange Panel.
Её будет видно, как они на этой странице рисуют: «Window — Extension — Adobe Exchange».
Потом в открывшейся панельке Adobe Exchange ищете EAN13Maker (он free — бесплатный) и он устанавливается в виде отдельного плагина.