Simple solutions
Scripts, programming and gaming tricks for Windows by Nirklars
Realtime digital audio processing using VST Plugins in programs without VST support
Notice! Please note that the software in this guide is closed source donationware/freeware.
An instructional how-to guide
Please scroll down a bit for the guide to configure and set it all up.
If you have sensitive hearing like me and enjoy listening to high fidelity music with high dynamic range its pretty annoying when the source quality of a track is poorly mastered. Usually it’s compressed to sound louder so it overshadows background noise when listening with open headphones, on the radio or on television. This compression phenomenon when referring to music media is commonly referred to as the loudness war.
Now, this post isn’t going to be about the loudness war but IT IS the main reason why I run some digital signal processing (DSP) using VST plugins. Basically a desperate attempt to save my poor ears from fatigue after long listening.
The Plugins?
VST Plugins use an open framework initially developed by Steinberg makers of Steinberg Cubase. The interface was released openly and is used by many different kinds of software in the digital audio processing field.
You might want to run VST plugins that simulate equalizers, reverb, pitch, chorus, expanders or any other kind of audio filter for that matter. In order to run these plugins in general software usually you need some kind of Wrapper.
Wrappers?
Wrappers are “plugins for the plugins”. Although there are only a few media players that have them.
For the music player Foobar2000 I’ve been using a VST wrapper for my needs. As you may know Foobar2000 is designed to only play audio. How do we run our VST plugins when watching video as well as audio?
The solution to signal processing using (almost) ANY program on Windows is to simulate a virtual soundcard device.
Sound card device (virtual cable) simulation
Properly referred to as “virtual cable simulation” is when you create a passthrough virtual sound card between the software playing the audio, the software processing the audio and the device playing back the audio.
Here is a workflow chart describing the process

Unfortunately there is no completely open source solution for simulating a sound device as far as I know. If you find one please leave a comment!
There is a very good free “donationware” closed source driver named VB-Audio Virtual Cable. This will be the software refered to in this guide/tutorial.
When VB-Audio Virtual Cable is installed and you’ve rebooted your computer you should notice two new audio devices named CABLE Input and CABLE Output in your windows audio settings. The left image shows the playback tab and the right image the recording tab.


Audio signal processing software VST Host
VSTHost is a free program that used to be open source. It’s currently closed due to the author disliking it being included without attribution. It’s still very much free to use and great for running your collection of VST plugins.
It can be a very complex program to use at first but hopefully I will manage to describe it easily for the purpose of running one simple example VST plugin.
Here is an image of VSTHost running a single simple VST plugin called ReLife V1.42 (C) by Terry West.

This plugin applies a phase shift, equalizer and a declipping algorithm to improve dynamics in overcompressed music. Of course if the audio source file is horribly overcompressed don’t expect it to perform miracles. Still it’s a great band aid to make listening to modern music easier on the ears.
Step by step setup instructions
Here is how you put it all together.
1. Download VB-Audio Virtual Cable Driver
The version I’ve installed and tested doesn’t contain any adware or malware and according to my firewall doesn’t attempt to connect to the internet for any reason. It’s named the following:
Virtual Audio MME, DX, WDM Device Driver (XP, VISTA, WIN7, WIN8 32/64 bits).
VBCABLEDriver_Pack42b.zip (1.01 MB – JUL 2013).
MD5 VBCABLEDriver_Pack42b.zip: 09b90461ea6f3d15f52bfff1a00e6690
2. Unpack the zip archive
Choose a folder that you wish to keep the control panel application. For example C:\Program Files\VBCable\
3. Run the setup corresponding to your operating system.
I.e. VBCABLE_Setup_x64.exe if youre running 64 bit. If you aren’t sure which you’re running check this guide.
After installing make sure to reboot.
4. Check the sample rate for VB-Audio Virtual Cable Driver
Start up the control panel by starting VBCABLE_ControlPanel.exe and note the output sample rate. In this case 44100 Hz.

The VB-Audio control panel looks something like this:
Note! If you’re only using the VST plugin for listening to music you don’t need to worry about anything other than the output sample rate. For video and audio “lip sync” check the bottom of this article.
5. Download VSTHost
I’m using version 1.54 and have tested it safe from adware and malware.
Choose vsthostx86.zip or vsthostx64.zip depending on your OS.
MD5 vsthostx86.zip: 7eb6fd861c976ea393875e85981a67ac
MD5 vsthostx64.zip: f51441c48c73bbd2dfd202ea7c51bcb1
6. Unpack the zip archive in the folder you wish to run it from.
For example C:\Program Files\VSTHost\
7. Get copies of the VST Plugin DLL files that you wish to use.
For example put all plugin DLL files in C:\Program Files\VSTHost\Plugins\
If you already have the VST Plugin files that you intend to use you can skip the next step.
8. Example VST plugin – Terry Wests ReLife utility V1.42.
If you don’t have any VST Plugins I will be using this as an example.
MD5 relife142.zip: 0d431c5dc7ac207e387835752a2fc380
EDIT: After I wrote this guide Terry has removed the download link for ReLife. It now costs money to download (still confusingly called donationware). As such this is a bad VST example and I apologize for that. You can find other free VST plugins here or here.
9. Run vsthost.exe and Click on Devices -> Wave to set your devices.

Here you want to set Input port to:
DS: CABLE Output (VB-Audio Virtual Cable) which we installed previously
Output port can be set to your playback device of choice. If you choose:
MME: Microsoft Sound Mapper
This means it will playback on your default Windows DirectSound output device which is probably what you wish to do.
10. [EDIT: Added this 2014-10-11] – Change process priorities to high
Depending on your sound card performance you should increase the process priority to high to avoid accidental random jitter.
Go into Engine -> Configuration and set the following:

11. Choose the correct sample rate and buffer size for your needs
Make sure to select the same sample rate as in VB-Audio control panel in step 4. In this case set the sample rate to 44100 Hz
For the buffer choose 2100 samples (21 b/s) for now. This value is beneficial to be as low as possible with regards to audio delay but if it’s too low you will hear noise interruptions caused by the computer keeping up to such a small buffer. If you hear clicking noise increase this.
Note! Same note as in step 4, if you’re only using the VST plugin for listening to music you don’t need to worry about anything more. For audio and video “lip sync”, see the bottom of this article.
12. Drag and drop the plugin DLL files that you wish to use on the vsthost window
In this example just drag and drop ReLife.dll
13. Arrange the plugins in the order you want them to work in a workflow sheet.
Here you can link together several VST plugins in the order that you want. Feel free to play around and make this as simple (or complex) as you wish!
Here are examples of a more complex setup.
14. Configure ReLife
Click on the small meter icon to show the VST interface
After clicking on ReLife you should see this. I prefer to use peak algorithm number 3.

15. Save your settings!
When you are done it should look something like this:

Click on Performance -> Save to save your current configuration.
Left click on each plugin to select it. Then right click it and make sure that the following is checked. This will ensure that VSTHost remembers settings for each VST plugin:
- PlugIn -> Autosave bank
- PlugIn -> Reload bank
16. Set default playback device in the program
Locate the option in your playback program to change output device (also called audio renderer) to specifically use “Cable Input”.
Here are examples of how to change it in VLC:
Changing it from this menu is only temporary:

You want to change it here for VLC to remember the settings:

And Media Player Classic:

Some programs don’t support changing the default output device. Unfortunately you won’t be able to use this solution with those.
17. Startup automatically with windows
If VSTHost isn’t running you won’t hear any audio so you may want it to start automatically with windows. Here is how:
- Click on View -> Minimize to system tray in VSTHost, check it.
- Create a shortcut to VSTHost.exe and place it in your Start Menu – > Startup folder
- Right click the shortcut and select Properties
- Change “Run Normally” to “Minimized“
- Цитата
- Цитата
- Удаление шума. Тут все понятно, всякие паразитические постоянно присутствующие помехи от некачественного оборудования: шипение, писки, гудения и проч.
- Обработка звукового сигнала эквалайзером. Восстановить нужный баланс частот, прибавить басов, убрать низкие частоты или наоборот. Тут все зависит от характеристик конкретного микрофона.
- Компрессия. Это процесс выравнивания громкости звука, работает за счет подавления амплитуды выше определенного порога. Звук обычно становится тише, но сохраняется на одном уровне.
- Нормализация. Общее увеличение громкости для компенсации потери громкости после компрессии на предыдущем шаге.
- VB-Audio Virtual Apps
https://www.vb-audio.com/Cable/index.htm - VSTHost
http://hermannseib.com/English/vsthost.htm - REAPER | ReaPlugs
https://www.reaper.fm/reaplugs/ - VST plug-in locations on Windows – Steinberg Support
https://helpcenter.steinberg.de/hc/en-u . on-Windows - Filters Guide · obsproject/obs-studio Wiki · GitHub
https://github.com/obsproject/obs-studi . vst-plugin - Скачать Open Broadcaster Software
https://obsproject.com/ru/download - Как настроить OBS Studio и сделать первый стрим
https://www.youtube.com/watch?v=KnbaAbb8BiY - Оформление стрима в OBS Studio и оповещения для донатов DonationAlerts
https://www.youtube.com/watch?v=dZItS6_MKNg - Плейлист Стримы: создание и настройка, работа с OBS Studio
https://www.youtube.com/playlist?list=P . tP9IXwxm9T - Поделиться в Facebook
- Поделиться в Twitter
- Поделиться в Reddit
- Поделиться в VK
- Поделиться в Tumblr
- Поделиться в Google+
- Цитата
- Цитата
- Цитата
- Цитата
- Цитата
- Цитата
- Цитата
- Цитата
18. Complete!
You are complete, the remaining steps are optional and only required if you intend to playback both video and audio together.
19. [Optional] Minimizing latency and “lip syncing”
The more latency you have for processing audio, the more delayed it will be when also watching video. To correct the delay between audio and video you need to manually specify the amount of delay for the video. This is also called “lip syncing” referring to the voices not moving accordingly to lips of people in video.
To calculate the “lip syncing” we need to get the size of the buffers created by VSTHost and VB-Audio. Unfortunately the delay must be calculated since buffer is sized in “samples” and not in time “seconds”.
To translate samples into seconds we need to divide the buffer sample size with the total sample rate.
Millisecond delay * Sample rate = Buffer sample size
When we know the delay in milliseconds for both VB-Audio and VSTHost we can add them together to get the total audio delay. This is the value we enter into the video player like VLC.
VSTHost latency
The buffer and sample rate is visible in Devices – > Wave where we previously set input/output devices.

To calculate the delay in time (seconds)
Example: 2100 / 44100 = 0.0476… seconds
VB-Audio latency
The buffer and sample rate is visible in the VB-audio Control panel.
To calculate the delay in time (seconds)
Example: 7168 / 44100=0.1625… seconds
Total latency
This gives us a total latency of 0.0476… + 0.1625… = 0,2101 seconds
Which is 210 milliseconds total.
20. [Optional] Configuring VLC audio delay to fix lip syncing
Go into Tools -> Preferences and select to Show All settings. Then Select Audio in the left tree menu and set Audio desynchronization compensation to -210 milliseconds

Known Issues (2014-04-28)
The audio delay may sometimes be delayed more than it should. I’ve noticed this a couple of times. Restarting VSTHost or changing the buffer rate temporarily and then back appears to fix it. I’ve done a lot of testing but am unsure of what’s actually causing it. If you have any ideas be sure to leave a message.
Thanks!
I hope this instructional guide was helpful to you ��
If you have any questions, anything more to add or if I made a mistake please don’t hesitate to leave a comment!
Share this:
Like this:
Related
21 Comments on “Realtime digital audio processing using VST Plugins in programs without VST support”
hey, I just would like to say thanks for the pointers to those software. Never knew this could be done. YOU DA REAL MVP.
vstHost doesn’t works correctly in windows 8;so u can use pedalboard2 instead of vsthost.it also easily configurable.Mac version of pedalboard2 also available.Website link:-http://www.niallmoody.com/apps/pedalboard2
VSTHost worked fine for me on Windows 8.1, whereas Pedalboard2 recognized VST plugins but it has always failed to load them.
EDIT: 2014-10-11
Added section 10 – Change process priorities to high
Depending on your sound card performance you should increase the process priority to high to avoid accidental random jitter.
Please note that for VSTHost any commercial (in your studio?) or public (a public performance?) use is strictly forbidden by the licence. I also don’t see any way to buy a commercial license. An excerpt from the license:
This free VSTHost is intended exclusively for private use. You may copy the complete program package and pass it on to others for private use only.
The free VSTHost may not be used for commercial or professional purposes.
The license.txt file appears to be contradictory to the program documentation, the manual and the website which states it is free and donationware. Here is an exempt from it:


Nevertheless if you do find the program useful I encourage donating to him! ��
You can also consider DDMF’s http://www.virtualaudiostream.com/ which has VST support. I used it for example with IK’s ARC2 room correction.
Thank you so much, it’s better, faster, and less buggy than winamp + VST Bridge + ffdshow. I’m using Izotope Ozone 5 with MPC-BE. Best.
OT : Carin : you must take a look at Ozone 6 and check the excellent tutorial on Groove3.com.
Thanks. It worked for real-time AutoTune. Sadly it has some delay.
Hello!
what a great guide here thanks was looking for it! ��
However while it works great for 2ch im struggling to get more then 2ch in a home theater enviroment running KODI and Coneq vst plugin which is a very powerful DRC (above Dirac)
The culprit could be the hdmi audio path from my geforce card?
Basically only the left and right channel are passing trough and I found no way on getting sub , centre and surround playing under vst host (tried with both VBaudio and VAS cables)
Do you know if its possible to send 5.1 PCM signal or 2 channels is the limit of vst host and\or the cables? any workaround (ie going asio or other programs)?
thanks!
andrea
ps
OS win7 64bit
I’m not quite sure of your exact configuration but you could try another DDMF product called Metaplugin http://ddmf.eu/metaplugin/ which is multi-channel enabled. At least you could see how it displays your sound card’s and VSTs’ I/Os and maybe report here?
Also check under Windows Control Panel>Sound your Nvidia HDMI output properties are not set to “L R HDMI Digital Jack”. You have to connect your Nvidia HDMI to a surround-capable receiver otherwise you will default to stereo mode (e.g. if you connect to a TV). Also check the Nvidia Control Panel under “Surround”. You might also try to go through a S/PDIF (coax) or TOSlink out of your PC to your receiver.
Last: search Google for “how to send surround sound through nvidia card hdmi”.
Hi Nemo!
thanks for the input ��
last weekend after a night of experiments �� I managed to solve as luckily ASIO drivers do permit multichannel input\output
If anyone is interested my “mistake” was in part to follow strictly the guide by selecting the virtual cable output in vst host which is ok but for 2 channels only.
For multi channel audio in movies select ASIO driver instead then in the asio control panel: enable virtual cable playback only (disable the recording cable) + enable the output card (in my case hdmi ), that’s it!.
You still need the input virtual cable as that is what you ‘ll select as the audio interface in the media player (KODI in my case).
Last in KODI make sure to use PCM with no pass trough option enabled as that would trigger DTS\Dolby decoding not supported by the chain
Some tweakings are then necessary regarding latency\buffer settings (currently using 256 samples) and I try to keep all settings @48khz which is what most of the video material is without oversampling.
Amazingly there’s not even audio delay so no correcton is required
I must say everything works like a charm with DRC correction (provided by the Coneq vst plugin in my case) completely transforming the movie experience!
if it was not for this guide I would not even know that it was possible!
really thanks a lot guys
andrea
Good news Andrea! BTW you’re the only person that I know who is using the Coneq plugin, especially the multi-channel version. How did you come across it? Did you see a review comparing it to other DRC solutions?
Correct i know it is an almost unknown brand which I (luckily) came accross with an italian online retailer (now coneq it is no longer listed) but from a tech point of view it remains unbeatable, just check they’re website and the technology behind is precisely on spot of what have to be done to get good sound
Main difference from any other solution is that it measure acoustic pressure by moving the mic all around the speaker; compared to the dirac solution which i tried the trial version, no match in sound quality (but already a lot better then without, dirac is indeed a very good product)
Its only compared to coneq that differences are remarkable and it doesn’t even hurt that is also cheaper.
Didn’t see any review I trusted the idea behind and first tried/purchased the 2ch for my small jvc desktop speakers, first time i was like ..holy sh..t fell of the chair
Then the 8ch plugin for the home theater setup was just consequential to try (actually im running thru a 30 days trial and the guide helped me a lot to asset a working configuration!)
i dont own any high end product but for me is just audio porn heaven ��
best money spent (IMHO)
take care ciao!
andrea
ouch! probably spoke to soon..using asio4all Im now facing a new issue which might not be possible to solve. Since asio4all merges 2 devices (nvidia hdmi audio and virtual cable) it appears after 20/30 minutes they go out of sync which brings gradually building up distortion.
Just opening\closing the asio control panel is enough to apparently reset the clock and the distortion but then again after x minutes it starts all over again.
All different buffer settings brings no benefits (if not only delaying when the issue start but so far nothing has been able to keep reasonable clock for at least 2 hours); all settings @16 bit 48khz
As it is not convenient to stop the movie to do the above not sure what to do at this point
Nothing found on google seems to provide a solution which is a pity as the system sounds fabolous…any idea would be great !
thanks
andrea
ps
issue occurs also without coneq vst under vst host, as stated in the asio4all instruction its related to multi device clock drifting
“If you are set on a multi-card setup then you want to use the WDM/WASAPI APIs on Windows”
“Do you have the two audio interfaces clock-sync’d?
If not, tracks recorded on each will eventually drift apart.
FWIW, Using ASIO4ALL or the Steinberg generic ASIO driver really isn’t an ideal solution.”
thanks for the input ��
In the end I probably found the culprit @ the source >> KODI
Since asio4all as stated doesn’t work well with multiple devices and I really didnt want to give up the room correction I looked around for alternatives and stumbled upon Jriver which among other things has native vst support!
This way i bypassed both vst host and the virtual cable
Preliminary test has shown that even after 2 hours there’s no sync drift mostly because this time asio4all output directly to the nvidia card
Well I wont say any more than this at the moment but looks like i might have found the final enviroment ��
Jriver > vst coneq 8ch > asio \nvidia > popcorns & beer > projector
Too good to be truth ? only time will tell ��
ciaoo
andrea
Hi Andrea! Good to know. JRiver is also my playback. I insert DDMF Metaplugin in the DSP Studio so I can see each of my plugins (such as Izotope Ozone 6 advanced, ARC2 and others) each in its own separate window at the same time on my screens.
Видео уроки для After Effects от AEplug

Настройка микрофона и обработка голоса для стрима с помощью VST плагинов в реальном времени для OBS Studio, Skype и др.

aeplug Санта
 Сообщения: 2802 Зарегистрирован: 18 мар 2016, 23:20 Откуда: С Ютуба Благодарил (а): 18 раз Поблагодарили: 274 раза Контактная информация:
Настройка микрофона и обработка голоса для стрима с помощью VST плагинов в реальном времени для OBS Studio, Skype и др.
Сообщение #1 aeplug » 27 май 2018, 23:19
Работа со звуком — очень большая, серьезная и сложная тема, требующая не только знаний, но и качественного оборудования. Я же всего лишь постарался дать вам начальные понятия, которые можно использовать уже сейчас для улучшения звука. Более подробную информацию вы легко сможете найти в интернете, на YouTube уже полно уроков на тему "крутой" обработки голоса.
Psi-Mera Нуб
 Сообщения: 7 Зарегистрирован: 18 июн 2016, 00:12 Поблагодарили: 3 раза Контактная информация:
Сообщение #2 Psi-Mera » 29 май 2018, 12:16
Да уж не из лёгких путей)
I. копирую *.dll файлы плагинов в папку C:\Program Files\VstPlugins
(если используется 32 битная OBS то возможно надо в папку C:\Program Files (x86)\VstPlugins но я не проверял)
II.
1) Нажимаю на шестерёнку рядом с каналом микрофона
2) захожу в настройки фильтров
III.
1) нажимаю плюсик в левом нижнем углу
2) Добавляю новый фильтр VST
IV. Даю ему название (в моём случае это "компрессор")
V. Выбираю из списка нужный мне плагин (в моём случае это "Fab-Filter — Pro-C2". Кстати советую эти плагины, очень хорошие)
VI. Открываю интерфейс и настраиваю плагин
aeplug Санта
Сообщения: 2802 Зарегистрирован: 18 мар 2016, 23:20 Откуда: С Ютуба Благодарил (а): 18 раз Поблагодарили: 274 раза Контактная информация:
Сообщение #3 aeplug » 29 май 2018, 12:35
Psi-Mera Нуб
Сообщения: 7 Зарегистрирован: 18 июн 2016, 00:12 Поблагодарили: 3 раза Контактная информация:
Сообщение #4 Psi-Mera » 29 май 2018, 14:29
aeplug Санта
Сообщения: 2802 Зарегистрирован: 18 мар 2016, 23:20 Откуда: С Ютуба Благодарил (а): 18 раз Поблагодарили: 274 раза Контактная информация:
Сообщение #5 aeplug » 29 май 2018, 14:44
Ну я эту схему собирал еще когда ОБС не поддерживала VST 
Отправлено спустя 5 минут 2 секунды:
Кстати, задержка что при vsthost что при той же схеме плагинов в obs у меня получилась одинаковая
Psi-Mera Нуб
Сообщения: 7 Зарегистрирован: 18 июн 2016, 00:12 Поблагодарили: 3 раза Контактная информация:
Сообщение #6 Psi-Mera » 29 май 2018, 16:16
про то что "в OBS такая возможность есть" имел ввиду возможность не использовать кучу костылей вроде VST HOST и виртуального кабеля. Автокомпенсации задержки вроде нет. Может завезут с обновлениями. В аудиосеквенсорах такое есть в каждом. Программа знает какую задержку даёт каждый плагин и другие аудиодорожки подгоняет задержкой к максимальной. Кстати некоторые плагины работают в разных режимах. Например эквалайзеры могут изменять фазу звука и работать с в реальном времени, то есть с нулевой задержкой, а могут фазу звука восстанавливать к исходной, но уже с садержкой это будет. Это тонкие моменты, звукорежиссеры знают для чего им это, а для стримов вполне годится режим работы с искажением фазы, но без задержки.
я вот использую почти везде Fab-Filter Pro-Q2 и в нём есть разные режимы
как в других эквалайзерах это меняется или какой там режим по умолчанию стоит, это документацию надо читать. Мастеринг если в названии иди Lin то скорее всего с задержкой будет.
А про кабель и хост, так у них задержка будет зависеть от того какой в них буфер поставить. Если большой то начинает быть заметна задержка, если маленький совсем, то будет треск, потому как драйвер не справляется за выделенное ему время с задачей. Если плагины лёгкие и настроено всё хорошо, то на слух может быть и не заметно разницы.
У меня этот хост стоял в конце цепи и там был эквалайзер которым я компенсировал искажения частот комнатой и если я смотрел видео или слушал музыку в плеере, то всё было хорошо, а как только я принимался за работу, то задержка сразу давала о себе знать, потому как в секвенсоре ползунок и визуальные пики звука были заметно раньше. В итоге я от этой схемы отказался и повесил эквалайзер в самом секвенсоре и использовал только в работе а для прослушивания в виндоусе включать и выключать цепь эту как-то муторно мне показалось.
А аудиокабель этот мне вообще стрим запорол. Я конденсаторный микрофон подключил, а он работает через ASIO и так как скайп не видит ASIO драйверы пришлось задействовать кабель. Пол часа до стрима проверяли и общались с человеком и всё было нормально, а потом на середине стрима начались трески. Я сначала не понял что это кабель их даёт, пересозвонились через дискорд погрешив на скайп, трески продолжились. Дошло откуда трески были до меня только после стрима.
И кстати как оказалось дискорд ASIO видит и можно было микрофон подключить к нему без этого виртуального кабеля.
Собственно имея такой опыт печальный с этими програмками я и решил посоветовать как можно обойтись без них и что OBS может работать с VST сама
Как пользоваться vst плагинами в Фл Студио 20-21
Пошаговая инструкция: как пользоваться vst плагинами в fl studio
Как пользоваться VST плагинами в FL Studio:
Шаг 1: Загрузите VST плагин в канал или многодорожечный микшер в FL Studio. Для этого нажмите кнопку «Add» на соответствующем канале или микшере и выберите ваш VST плагин из списка.
Шаг 2: Настройте параметры VST плагина. Каждый VST плагин имеет свои собственные параметры и интерфейс, поэтому настройки могут отличаться от плагина к плагину. Обычно настройки можно изменять с помощью мыши или с клавиатуры, а также можно использовать контроллеры MIDI для более точной настройки.
Шаг 3: Примените эффекты VST плагина к звуковому сигналу. Для этого просто играйте на MIDI клавиатуре или введите ноты в пианино ролик, чтобы услышать изменения звука.
Шаг 4: Сохраните настройки VST плагина, если вы хотите использовать их в будущем. Обычно настройки сохраняются автоматически в проекте FL Studio, но если вы хотите сохранить настройки отдельно, вам нужно выбрать соответствующий пункт меню в VST плагине.
Как использовать vst плагины в реальном времени
Важно понимать разницу между различными типами плагинов, чтобы выбрать подходящий для вашего проекта. Также плагины можно использовать одновременно, выстраивая в цепь обработки.
Например: гейт — сатурация — компрессия.
В этой статье мы подробно рассказывали о постобработке звука в программе Audacity. А здесь рассказывали о применении компрессии в той же программе.
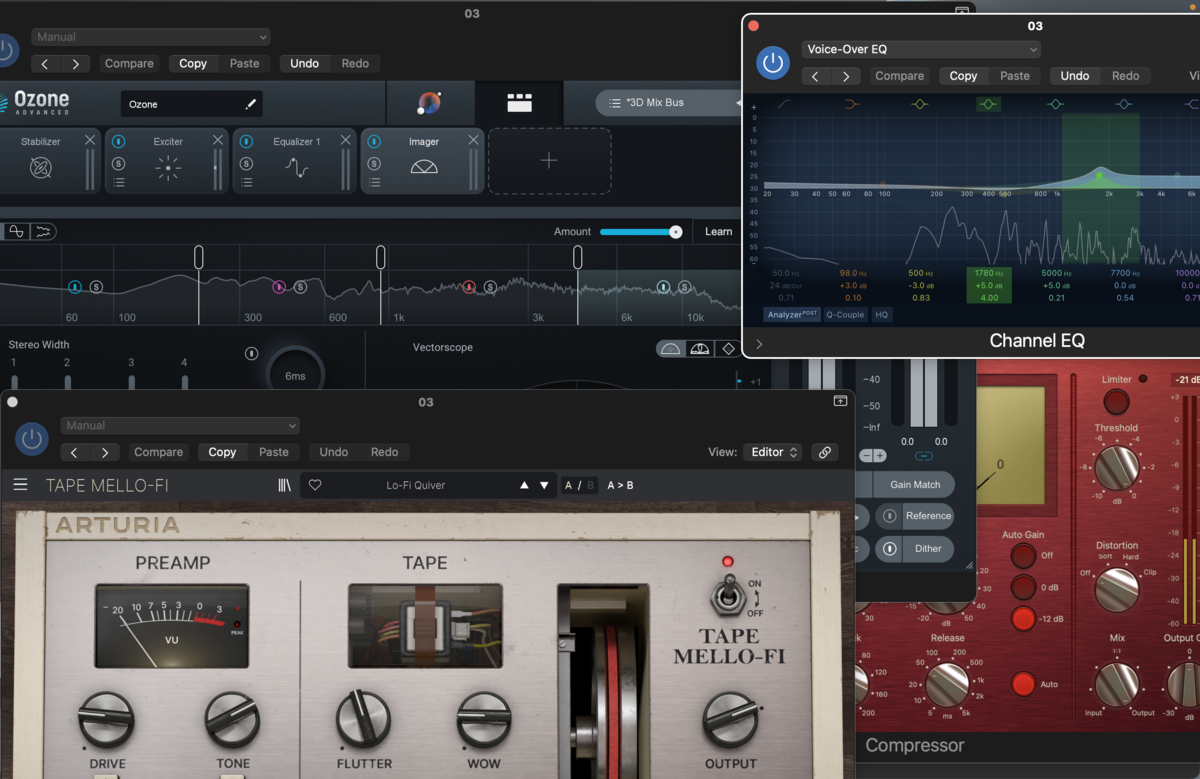
2. Где искать плагины
На сайтах Plugin Boutique, Plugin Alliance, Splice и KVR Audio предлагают обширные базы данных VST плагинов с возможностью поиска по категориям, производителям и ценовому диапазону. Часто можно выловить плагины, которые отдают со скидками или даже бесплатные.
Также можно посетить сайты производителей VST плагинов. Некоторые производители предлагают бесплатные пробные версии, чтобы вы могли опробовать их перед покупкой. Например, такие производители, как Soundtoys, Waves, iZotope, Fabfilter, UAD.

3. Установите плагин
Большинство плагинов поставляются с программой установки, которая поможет вам пройти весь процесс. После установки плагина он должен быть доступен в меню плагинов вашей DAW.
Совместимость: Убедитесь, что плагины, которые вы хотите использовать, совместимы с вашей DAW. Большинство DAW поддерживают формат плагинов VST или AU (формат плагинов, созданный Apple для компьютеров Mac).
Установка: Установите плагины в соответствии с инструкциями производителя. Обычно это включает в себя копирование файла плагина в соответствующую папку в вашей DAW.
Авторизация: Некоторые платные плагины требуют авторизации, то есть ввода серийного номера или использования ключа iLok (USB ключ для хранения и авторизации лицензий на ПО).